Monday, September 2, 2013

How to make a wind chime from utensils—the lazy way


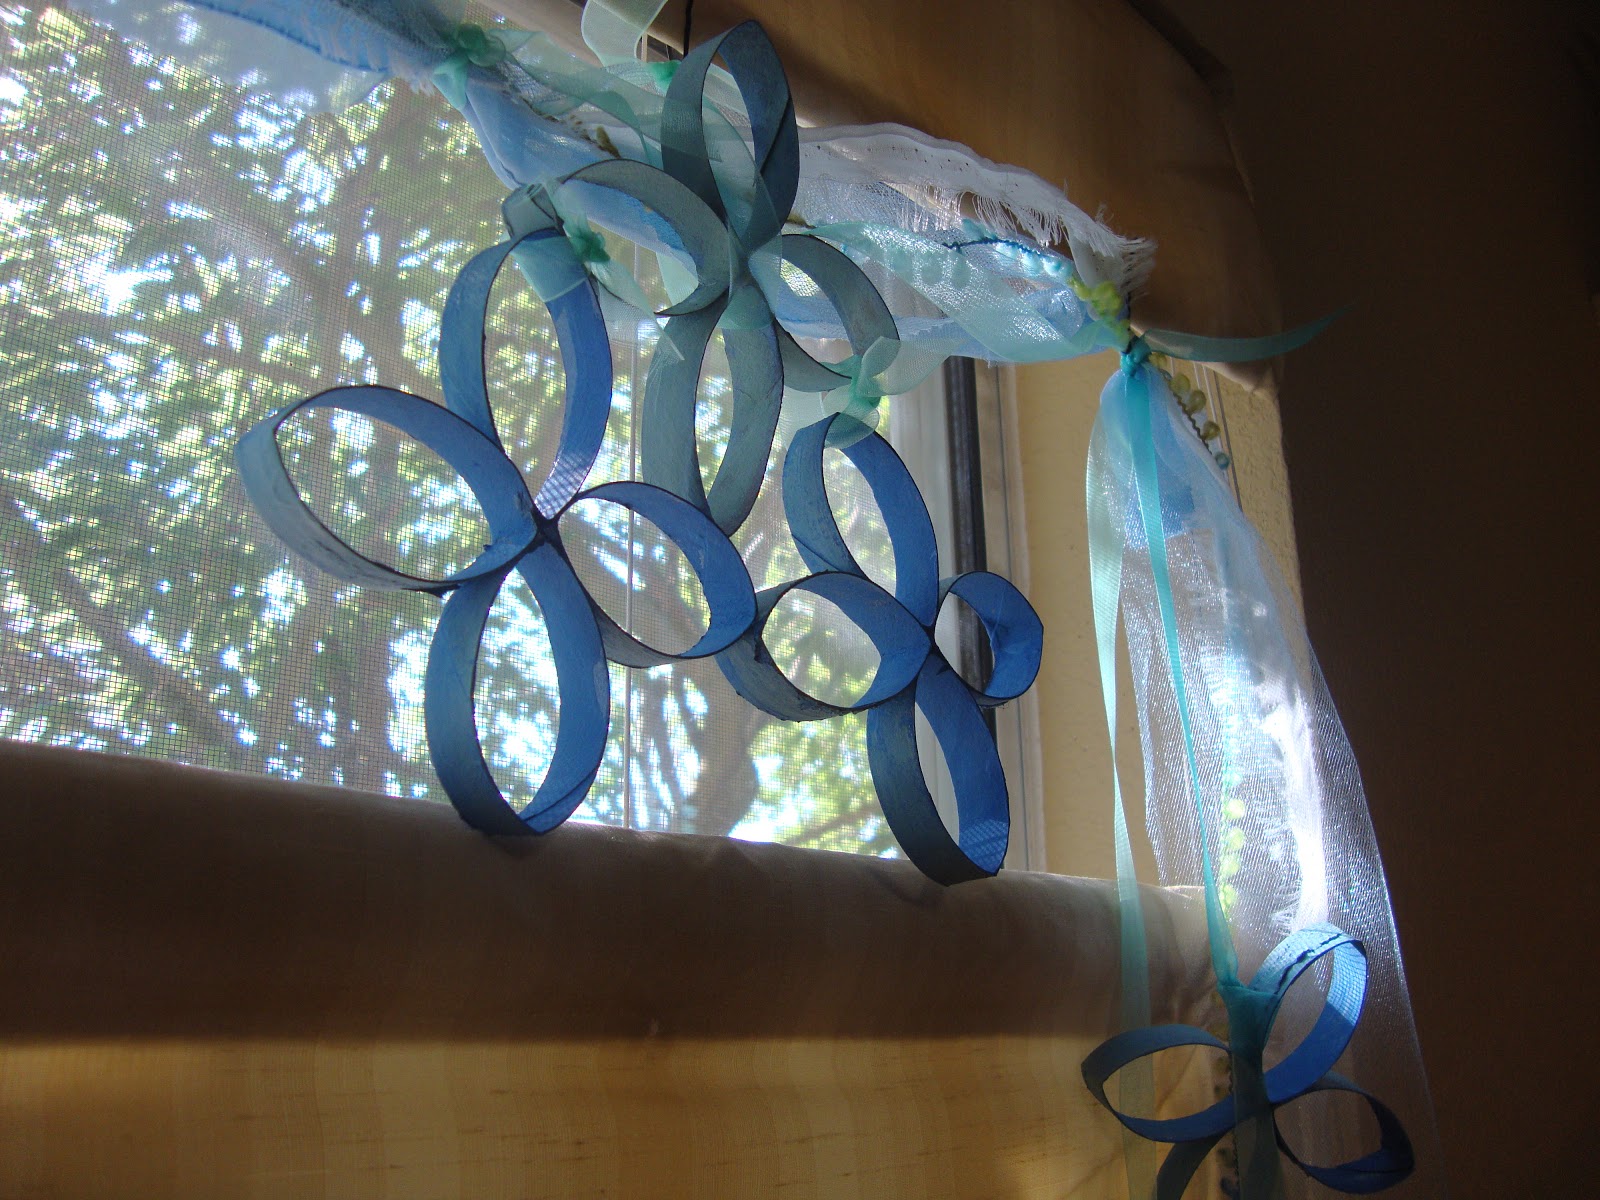
The August challenge for Team Upcyclers on etsy.com was to repurpose utensils. In one evening I put together this wind chime from whisks, a tea strainer, tin molds and a veggie steamer. Most of the utensil wind chimes pictured on Pinterest and Google Images were constructed with forks and spoons, and I felt compelled to use something else.

These whisks called out to me with their fascinating spirals. They were keeping company with unremarkable butter knives in a plastic shoe box at my second favorite thrift store (a search through my favorite one having yielded nothing.) When I saw the veggie steamer next, I knew the project was guaranteed.


I couldn't resist playing with the little strainer and this thingamajig with a spiral cup at one end. They look like they're having relationship problems. They start out being one, then she tries to leave, he chases her down and makes her stay. Shadow theater over.

Now this trio here look like curly-headed chums. If they could speak they'd go around saying, "Boing, boing, boing..." I've named them Larry, Curly and Moe. I knew just from looking at them that I wanted to bedeck them with beads and colorful wire. They're not the leather and lace sort. You can tell.

The steamer can fold and unfold its petals. Bonus! That would give the wind chime several looks to suit your mood. At a glance, your sweetie can gauge if you're approachable or not. Ha!

 Feeling reclusive? Clam up.
Feeling extroverted? Unclench.

The steamer has an outrigger of sorts, which lit up the part of my brain that reacts to external stimuli such as chocolate, a great bargain, and a well-built man. But I digress. The outrigger gave me the idea to clamp everything on with clip-on curtain rings.


That reminds me of the original, unDisneyfied version of The Little Mermaid that I read as a child. She turned 15 and her grandma dressed her to go to the surface of the ocean for the first time. Granny ordered shells (mussels? clams?) to clamp themselves onto the Little Mermaid's tail. She protested at how they pinched. I don't recall the exact words, but Granny responded with something akin to "no pain, no gain" or beauty requires sacrifice. As a tomboy, I didn't get that. As a middle-aged woman, I wish it weren't true.

It was three days to deadline when I decided to make the wind chime, which meant I had no time to wait for paint and glue to dry, nor would I be able to wrestle with much wiring. So help me, God, I am a clutz with wire. Why I ever imagined it would behave as docile as thread is beyond me. Wire is as obstinate as my wild woman mane when I've washed but haven't conditioned it. Anywho, in lieu of paint and glue, I decided to use beads, wire, and clip-on curtain rings.


I rounded up a handful of brooches that I haven't worn in years, along with a couple of beaded necklaces. On my way back to the dining table I noticed the tin molds that had been sitting on the entryway table since the day I brought them home from a thrift store foray months ago. I scooped them up as well. The hubbadubs obliged my request to drill tiny holes in the tin molds so I could wire them. Actually I handed him a hammer and a nail to get the job done, but he came up with the idea to use the drill. He is so not a caveman. That's a good thing.


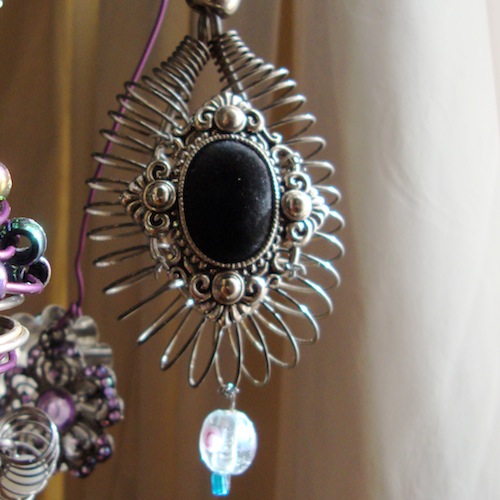
I looked at all the stuff I'd piled on the table and didn't know where to begin or what I wanted the wind chime to look like. But the clock said it was getting darn near close to bedtime, so I just picked up the closest thing and it happened to be the tea strainer. Plain old thing. The round brooch fit it just so. I wired them together about halfway and gave up. I have too many thumbs and not enough agile fingers. Luckily hubbadubs came to the rescue and finished wiring it. Then I added the little bead dangle.


Larry, Curly and Moe's makeovers went swimmingly. Those guys could win the pageant.


The spiral guy had enough of a mesmerizing thing going on, so I left that part bare. His stem got a bedecking with purple crisscrossing wire and several lavender beads.


Once all the utensils were gussied up it was just a matter of clipping them onto the steamer, making sure they were equally spaced.

Let's take a look at the finished product again.


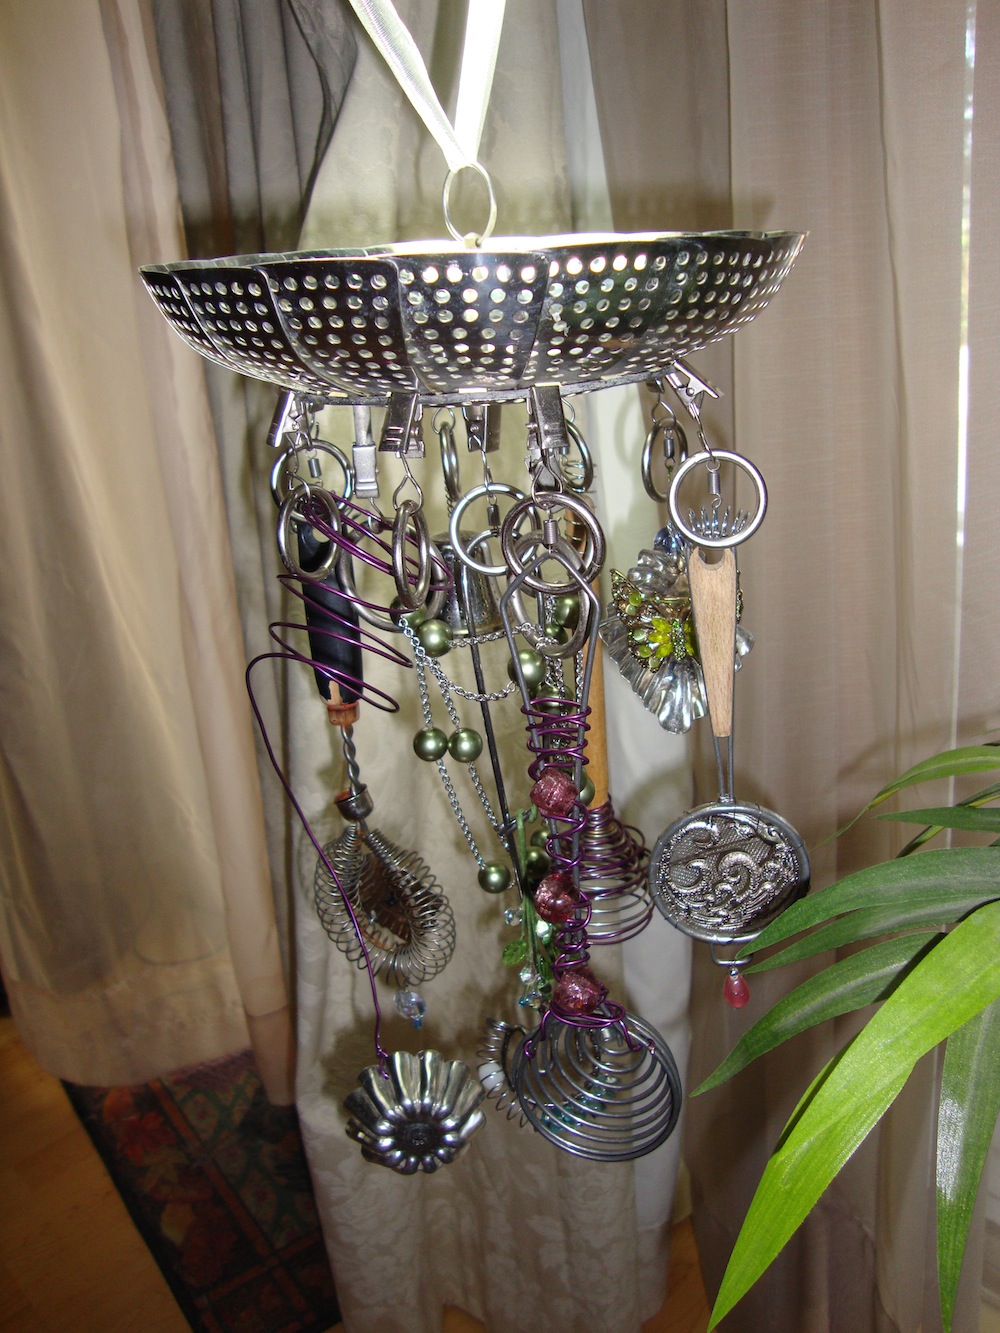
In retrospect, I'm glad I didn't try to paint this. I was even tempted to use sparkly nail polish! But that would've demanded careful styling so the whole project wouldn't turn kitschy. That was far more mental work than my sleepy state would allow.

What do you think? What would you upcycle to create a wind chime?

My teammates' imaginative entries can be seen on the team's Pinterest board. Stop by!


Friday, August 30, 2013

Utensil wind chime—Upcyclers Challenge


Wisks, steamer, candy mold, strainer—just add beads and you have the makings of a quirky wind chime. Come back Monday (Sept 2) and I'll have a write-up on how I made it. Lots of pics and commentary, I promise!


Monday, July 1, 2013

Vanquishing Mold, and My Near-Lobotomy


I have learned to back into chores that are unseemly. If I list them, they might get done in a few years. So the best way to get them out of the way is to ambush myself.

The fridge has been pooling water under the crisper. The husband was notified about this a week or so ago and has made verbal noises about replacing some tube or other. In the meantime, I have been sopping up with rags. I must have been tardy in thinking to look under the crisper, because now there are dots of mold afloat.

It is triple-digit heat outside. I have a clothesline between trees in the back yard because I fancy myself a countrified girl who would hang up the laundry outdoors, although I never actually do. The most action that clothesline ever sees are the sporadic photo shoots of the patched-together garments I sew for my etsy shop.

Rags plus heat and sunshine equal mold demise. I decide to hang up the rags when I replace them with a dry set. But on the way from crisper to outdoors, the rags make a stop in the bathroom, where sits a bucket of bleach and water leftover from my last ambitious mopping blitz. We are out of bleach, so I must conserve what we do have until I have the energy to finish mopping downstairs, or until the husband has the motivation to endure the heat and fetch more bleach.

I wring out the rags in the bleach water and notice the shower stall’s aggravating new patina of hard water and soap scum. One swipe, then another, and soon I am vigorously wiping all the walls, digging my fingernail into the rag to excavate the grout gunk. Then I look up.

The black mold stares down at me. How long has it lived on the ceiling and upper wall? Years. I get up on a step stool and scrub at it. “It” may not be grammatically correct, as I am beginning to think they are legion, the way they spread.

“What are you up to in there?” the husband inquires. Bathroom cleaning is a rare occurrence, as you might have surmised. When I explain, he proclaims he is inspired, which I decide is code for “Assign me some task.” I send him to the garage for some protective eyewear to shield me from mold spray, which is the next step in my plan of attack.

The husband makes an offering of the goggles, and since I have dripping rubber gloves on my hands, I bow my head to indicate that he may approach and set them on my face.

Suddenly I erupt in a shriek. “It’s going in my ear!” I feel my right ear being raped by one of the handles that should go above, not inside, the lobe.

He jumps back and nearly drops the goggles, reduced to a shivering heap. The last time I had that effect on someone, it was my dental hygienist, who had struck an oil pipeline in my mouth and recoiled at the ensuing gush of red.

“I’ll go get you some bleach,” he calls over his shoulder as he shuts the front door behind him.

“Get an eggplant while you’re at it,” I shout back over the bathroom vent. There is a recipe for vegan lasagna that has been an open tab on my laptop for a few weeks.

I spray the mold killer liberally over the areas that are still slightly dark. I curse whoever invented stucco finish and whoever decided it was appropriate for a bathroom.

The rags are soaking in the bleach water, which is now dark. I should get them onto the clothesline, but that is classified as a chore. I think I’ll wait to ambush myself.

Wednesday, May 15, 2013

Late Bloomers have more fun!


Teresa Cash, who blogs at "I'm a Late Bloomer," has a heartfelt mission: to encourage people to awaken to their latent talent. She knows firsthand the experience of only later in life discovering and nurturing the seed of a dream hidden for so long.

I learned about Teresa's blog via a comment she made on Where Women Create's Facebook page. Immediately her passion resonated with me. Her motive—encouragement—aligns with my values. Her method—storytelling—allows people to share from the heart in an environment that celebrates each person's unique journey. There is no competitiveness, no horn-tooting, nothing to hardsell. In addition, Teresa's blog design is so appealing that it is a visual treat along with a filling feast for the soul.

When she and I "met" via email, Teresa's blog was going through a lull. She had written a beautiful and candid post about learning to let go and trust. As much as she believed in her dream of celebrating creative late bloomers, she also had to believe that "the stories are out there and will be directed to me."


"Magical things can happen when we let our creative spirits out to play. Everyone has a story and it’s in telling your story that  you can encourage and inspire someone else. Being a creative Late Bloomer is not about being a certain age or doing something totally magnificent. It’s about finding your creative self, later in life, even in the simple things." ~Teresa Cash
Today, Teresa featured my story on her blog. It would mean the world to me if you could visit her at I'm a Late Bloomer and leave a comment. Encouragers always appreciate encouragement!

Sunday, May 12, 2013

When a coffee can becomes affordable housing, you must be a hobbit


I'll let you know now that I suck at writing tutorials. I'm not letting that stop me. I made something and now I want to tell you how I did it. But here's why I think you'd do a better job at it:

  1. You won't scavenge materials that most people are unlikely to have lying around.
  2. You won't go overboard with three possible options for completing the project, like some hoity-toity film with a focus group to decide which of two endings is better.
  3. You won't be writing asides that have little to do with moving the how-to along.
Given all that, I'm still writing this tutorial. Mondays are linkyhoppy days, or something that sounds like that. What I mean is there's this blog where my etsy Upcyclers teammates and I can have a virtual meet-up every Monday and exchange links to tutorials we've written that we hope give people enough incentive to visit our blogs. If you're here at my blog and you're not even remotely interested in crafts—I know the name of a good lobotomist. Just kidding. You're still welcome to follow the winding road to the corky, quirky Itty Bitty Hobbit House that smells like coffee.

And isn't it a relief to read me not being consumed with angst over the latest life dilemma? Not today, anyway. You'd think I was cured by craft therapy.


So. Why turn a coffee can into a hobbit house. Because I have too much time on my hands and hardly any money. I can't buy advertising for my etsy shop, but every month everyone on the Upcyclers team can get free exposure for their shops if they win first and second place in the monthly challenge. This month the challenge was to make something with a plastic coffee can. I didn't even realize we had one until I went to make a protein shake and read the label. It's a coffee-flavored protein mix. Close enough.

Once I peeled the label off I thought I'd turn the gray into a putty-colored background with some acrylic paint. I wanted to Sharpie a cottage-style stone facade on it. I couldn't find a wide enough paintbrush so I used a cosmetic sponge to dab it on. Then I drew four stones before remembering that I can't draw. Plan B: Glue stuff on instead. In which case, pre-painting had been a mistake, as the paint peeled off in spots when I started gluing things on. The paint peeled, taking the glue and the thingy off with it. Such uncooperative paint. I reglued things back. More on exactly what things in a minute.

You'll see from the pictures above that there is an oval-shaped hole cut into the back side of the coffee can. That's for the door. I had an oval tea can with a secure-lock lid that in a lucid moment I recognized as a castle-ish drawbridge kind of gate that you could lower over a moat. At first I'd asked the hubby to cut the tea can down to an inch below the lid. But it's metal, and plastic is much softer to cut. The tea can ended up being inserted into the coffee can.


I'm so glad I numbered these collages when I saved them last week so I know without studying them in detail what order to post them. We are at the Inside and Outside phase of hobbit house construction. By keeping to a loose theme ("kitchen scraps") I managed to  self-edit and not use sequins and other temptingly sparkly stuff that would've pleased Liberace if Liberace had been hobbit-sized. Instead I used wine corks, dried shiitake mushrooms, dry beans, and two reed coasters (pretend they slide open and reveal windows). The husband protested the use of the mushrooms but I only needed a handful.

What is that multicolored sheet of sponge remnants in the center of the collage? Does anyone know? This is not a quiz. I don't know what it's for. Maybe some sort of insulation? I found it at a thrift store years ago and took it home because it was pretty and I knew I'd find something to do with it before I croaked. It approximates the rock facade I had failed to draw.

The paper towel tube, styrofoam and toothpicks form the base of a tree that I imagine grows above the hobbit house. I figured a tree would be easier to recreate than a hillside, which is usually where hobbit houses are located, per hobbit house realtors.


Right about now I'm so over this tutorial. I can't imagine why you're still with me. Haven't I proven that making a hobbit house my way is the way you wouldn't want to go? Why is the hobbit house wearing a turban in the photo above? Where on earth would you scrounge for a sticker of a door that just happens to fit over the lid of an oval tea can?

Door stickers: Fun enclosed gift from etsy shop Wilson Graphics when I ordered giant vinyl butterflies for last year's Halloween costume. Turban: brown paper wrapper scrunched up to play the role of dirt under tree roots. Tree roots: paper bags twisted and then tied like Joan of Arc at the stake around the paper towel tube using the handle of a paper bag. Coffee filters: a skirt for the tree roots. Why I thought they needed a skirt is unclear to me now. But I couldn't just leave them exposed.


More twisting of paper bags. These paper pretzels were reinforced with 24-gauge (I think) green wire from my dungeon full of craft hoards that will be the only things my children will inherit upon my demise. The wire made the twisty branches hold their shape better. I glued one more coffee filter around the base of the branches just to prettify it.


And now for the treetop. I have commitment phobia when it come to crafts. It's probably why it takes me 10 times longer to finish a project than the average crafter. Not to imply that a crafter is average or ordinary. But here we have three kinds of trees: a spindly desert type tree, an effusive, improbable wisteria, and—my personal favorite—a woolly bully evergreen from all those nets that oranges and onions come in. I KNEW I'd someday find a reuse for them. The last treetop is the least feasible, as I haven't a notion how to affix those blob-shaped nets in place.


Here we are, outside, trying not to fall over during our portrait session.  I am so glad this isn't a project that a hypothetical gradeschool child of mine will have to keep on his lap on the schoolbus tomorrow. Stupid treetop is so unwieldy.

It will be a relief to return to fabrics as my medium of expression! 

Oh~ P.S. There was an accidental offshoot of this project. I decorated one of those wooden birdhouses one can get cheap from a Michael's craft store. I used coffee filters as roof shingles. For the siding, I spread a texturizing product that purports to make any paper look handmade. I had intended to top the hobbit house with this birdhouse. Do you think I should've stuck with that plan instead of trying to make a tree?

"Poems are made by fools like me but only God can make a tree."
~Joyce Kilmer


Monday, May 6, 2013

The life lesson I'm reluctant to learn


Life charges too high a price for some lessons. This one, in particular, wants my ego, perhaps my health or that of my loved ones, and all my comfort zones in exchange for wisdom.

I can say the words, "We are one" and not really believe it. Either I live it or it remains in its package, delivered but unopened. I cannot send it back because there is no return address. And so it sits at my front door, waiting...

Monday, April 29, 2013

Shooting Stars Streamer: a Toilet Paper Tube Tutorial


The Upcyclers team on etsy.com, to which I belong as a committed scrap crafter, challenged us to come up with something made of toilet paper tubes. For months I've saved them, but I couldn't settle on a design. There were so many great ideas online!


From http://suzyssitcom.com/
I had ambitions to create something like this for our Palladian window. I'd make only half of it, as the window is a half-arc.


Then I downgraded the dream somewhat and thought I'd make panels like these for an iron lamp I've had in the garage for years. I might yet do that.

It took a deadline to get me off the fence. (Spoiler alert: I missed the etsy team deadline. I was busy practicing headstands at yoga teacher training this weekend.)

Last month the challenge was to upcycle a necktie. I took a blue and green necktie and handsewed it into a mermaid necklace, which took second place and earned my etsy shop, Swoosh by Scrollwork, a spot on the sidebar of the team's blog for a month. It looks like this.

I didn't have the patience to peel off the
clingy bits of toilet paper.
I started snipping the toilet paper tubes in half, then quarters, then eighths. I didn't count how many tubes I'd snipped. I stopped when my hand got tired. 

Then I glued together four loops at a time. The inspiration pictures above have five and six loops, respectively, but I was being a lazy bum about it. I ended up making 15 "stars".

Turns out four-looped thingamajigs look like a spirograph when stacked. I might make this the starting point of another project.


Prototype for next project resting atop hopelessly inaccurate scale.
The most time-consuming part was painting each piece inside and out. I tried spray paint meant for silk flowers, but the can was so old that the paint slid right off. Confession: I have boxes of ancient craft supplies, including petrified glues for every need I thought I might encounter for the next 20 years. I keep them in the coat closet under the stairs, which my Mom has dubbed "the dungeon."


More paint on the work surface than on the project
Luckily I found bottles of green and blue acrylic paint that weren't transfixed by the sight of Medusa's head, and a slender brush that hadn't had Botox. I had a moment of alarm when Charlie, my 18-pound Maine Coon, hopped on the dining room table and sniffed at the wet pieces. But all was well. Apparently watching paint dry was less interesting than watching grass grow from the safe enclosure of our second-floor deck.


Here's what else I found in the dungeon to use:

  • A roll of blue tulle
  • A roll of shimmery sheer nylon seafoam ribbon, 5/8 inch wide
  • A skein of bumpy yarn in seafoam, chartreuse and yellow
  • The selvage of a sheer white drapery panel that I had ripped into strips for another project last week. It had a nice feathery edge. 94 inches long, approx.
  • The hem of a sheer blue chiffon curtain, which I had also ripped up. 58 inches long, approx.
I cut the tulle, ribbon and yarn slightly longer than the selvage and hem. With short lengths of ribbon, I tied them all together at the center and at four more points about six inches apart.

Using more of the ribbon, I tied the loops of toilet paper tubes in bunches of three. You can see in succeeding pictures how these were done. At opposite ends and in the middle, they're in a vertical row. At the other two points, they're in triangles.


I could see this as a valance, where the shimmery fabric would cast a suncatcher spell.

It would also be lovely strung across a child's four-poster bed.


Quite by accident, I found it also acts like an indoor windsock, creating a cooling visual effect on a warm California afternoon. There's something carefree and casual about it.

Behind the scenes, though, I wasn't the picture of serenity creating it.


Outtake from the photo shoot. Ouch-take. But I'll live.